Ol' Number 9
#9 Headlamp Projector
I wanted
an oil burning headlamp for #9, and since you can't run out and
buy one...
I have made old style headlamps for
inch and a half scale engines but never an actual oil burner.
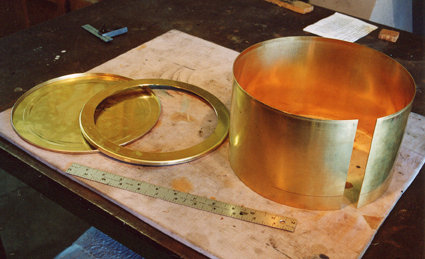
The first task was to find an oil lamp mechanism and chimney
that was small enough. I finally found a beautiful solid brass
burner and glass chimney made in England. This basically determined
the size of the headlamp. Here you see the main cylinder for
the body and the front and back.
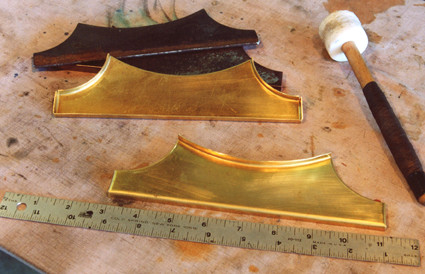
#9 headlamp Base
This is the
die and formed bits for the headlamp base. Most of the brass
in the headlamp is .040". The forming dies for these pieces
is 3/16" steel. The brass is clamped between the dies with
some C clamps, and the edge worked over with a plastic or rawhide
mallet. Never use a metal hammer when forming brass, it will
leave dents.
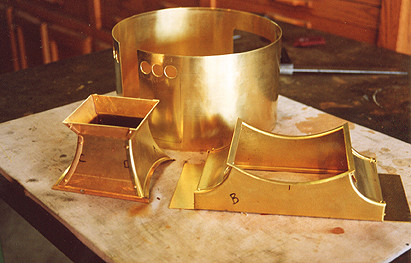
#9 Headlamp Assemblies
The
main pieces.
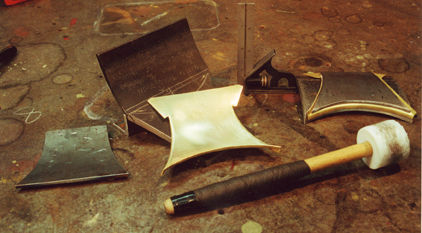
#9 Chimney
Forming the chimney.
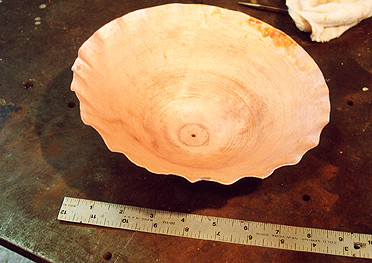
#9 Forming the Reflector
The
reflector for the headlamp was made of .032" copper. It
was spun on a wood die in the lathe. I have since learned to
make them out of thicker material, as it doesn't wrinkle so easily.
After the first spinning you get a work hardened wrinkled mess
as you can see in the photo. Take it off the die and gently flatten
out the piecrust around the edges with a rawhide mallet then
anneal it. To anneal heat it to dull red and quench in ice water,
the colder the water the better. This will soften the copper
and you can return it to the die and have at it some more. These
reflectors have quite a dish to them and will need to be annealed
and returned to the die eight or ten times.
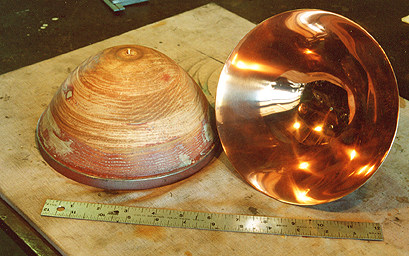
#9 Headlamp reflector
Here
is the mostly done reflector, sitting next to the die it was
formed on.. It has had a piece of 2" tube soldered to the
back so it can be spun in the lathe for polishing. Polishing
is started out with an angle die grinder and #80 grit, working
down with finer and finer grit until you reach #1000 grit. And
then Semi Chrome metal polish. After you get it looking like
a mirror it's time to cut the holes for the burner and chimney.
One towards the bottom, and one towards the top. The trick is
to do this without scratching it because you can't spin it in
the late once you cut the holes. Then off to be nickel plated.
{BACK}
{A&C SHOPS} {BERKSHIRE} {AMERICANS} {No. 9} {CARS} {JEWELRY} {CONTACT}
copyright
© 2004-2006, Jack Bodenmann, all rights reserved.